Running Tests
Tests run from VS Code’s Testing view or from the editor, and their results appear in both. This page covers what each kind of run does in Ceedling, how results are shown, how tests are labeled, and the cleanup commands. Debugging has a page of its own, Debugging.
Where to run tests
Every test in the Testing view has run and debug buttons, and so does every test file. The editor’s gutter shows the same buttons beside each test function and parametrized case.

The view groups tests by where they come from. A workspace folder holding several Ceedling projects lists each project, by its name, with its test files beneath it. A folder holding one project lists its test files directly. A workspace with several folders adds an entry per folder, labeled Ceedling (folder).
How a run calls Ceedling
Each run calls one of Ceedling’s test: tasks, with the arguments ceedlingExplorer.testCommandArgs gives. A run of a test file runs that file’s task, and a run of a whole project runs test:all. Coverage runs use their plugin’s tasks instead, gcov: or bullseye:, as Code Coverage explains.
A run covering several projects runs them one after another. Separate runs of projects in different directories may overlap. Commands within one project directory, or in projects sharing a build directory, never overlap, since Ceedling’s builds there would collide.
A single test
Running a single test function runs only that function, through Ceedling’s --test-case filter. Ceedling still compiles the function’s whole test file.
Ceedling’s filter matches by substring, so a filter for test_Add also matches test_AddOverflow. When the filter matches another test in the file, the extension runs the whole file instead, and reports every test in it. The extension’s log says when that happens.
Parametrized test cases
Each case of a parametrized test appears beneath its function in the Testing view, as Ceedling runs it. Unity’s TEST_CASE(), TEST_RANGE(), and TEST_MATRIX() all produce cases.
Parametrized tests need one project setting. Unity’s markers take effect only with :unity ↳ :use_param_tests set to true. The Testing view lists each case separately only then.
Ceedling 1.0.0 also needs test-file preprocessing off, since its preprocessing loses the markers. Set :project ↳ :use_test_preprocessor to :none, its default, or to :mocks. Ceedling 1.1.0 and later handle parametrized tests either way.
Running one case runs all the cases of its function, since Ceedling selects tests by function. Every case reports its own result.
Results
A run reports each test’s outcome in the Testing view once Ceedling finishes the command that ran it. A failed test shows its message at its failing line, in the Testing view and inline in the editor.
A build that fails marks each of its tests errored, with the build’s error. The Test Results panel holds Ceedling’s full output for each run, with every compiler and linker error. Problem matching can also report those errors in the editor and the Problems panel.
A test that crashes is reported as a failure too, through Ceedling’s :use_backtrace setting. Debugging explains its choices.
Test labels
The Testing view shortens test and file labels by default, so long names stay readable. Two settings control it, ceedlingExplorer.prettyTestLabel and ceedlingExplorer.prettyTestFileLabel.
A test’s label drops its prefix. For example, test_BlinkTaskShouldToggleLed becomes BlinkTaskShouldToggleLed.
| Off | On |
|---|---|
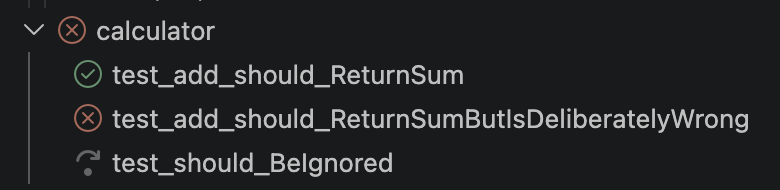 |
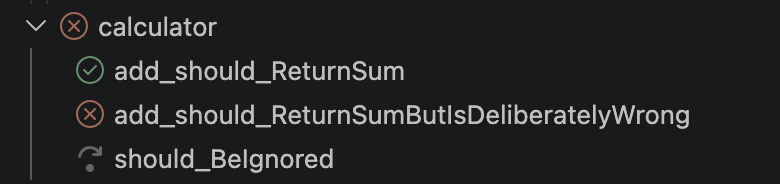 |
A test file’s label drops its path, prefix, and extension. For example, test/LEDs/test_BlinkTask.c becomes BlinkTask.
| Off | On |
|---|---|
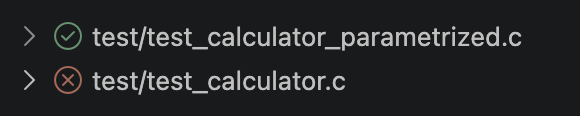 |
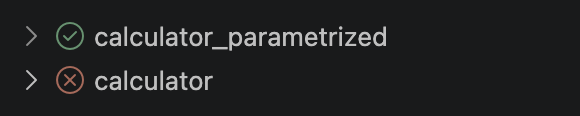 |
The prefixes come from the project’s own configuration, :test_runner ↳ :test_prefix and :project ↳ :test_file_prefix.
Clean and Clobber
The Testing view’s toolbar has Clean and Clobber buttons. They run ceedling clean and ceedling clobber in every Ceedling project in the workspace. Each project’s command waits for any Ceedling build under way in that project to finish. Configuration lists their command IDs, for keyboard shortcuts.
After upgrading Ceedling
Ceedling 1.2.2 builds each test in a new place, and an earlier release’s build output stays until a clobber. After an upgrade from Ceedling 1.2.0 or 1.2.1, the first build offers to clobber the project. Accepting it clobbers once the runs under way finish. After an upgrade from an earlier release, clobber once with the toolbar button. The Known Issues list the cases where no offer appears.